
Welcome to part one of my “Building a 20 disk FreeNas fileserver” blog. Years ago, I built a fileserver to satisfy my file sharing, music playing, Kodi viewing and backup pleasure. It has definitely served me well over the years, but it really began to show its age. The biggest annoyance was the 10mbps network interface which was adequate for most use but, as you might expect, copying large amounts of data just took ages.
So I embarked on the ever joyful upgrade experience track and today, I am happy to announce that “FileServer Mark-II” is fully up and running.
 I started choosing and ordering parts in April 2016. Four months later, in August 2016, the system as partially completed and was taken “into production”. At that time it only used one HBA with 10 new 4TB HDD.
Yesterday, another three months later, I (finally) added the 10 3TB HDD from the old fileserver. I just wanted to be absolutely certain that all the data was copied successfully to the new fileserver, before I erase the original file system.
Below I will detail the components I used and the reasons why I selected them. I will also include the best price I can find for the components (dated 5-November-2016).
The system details:
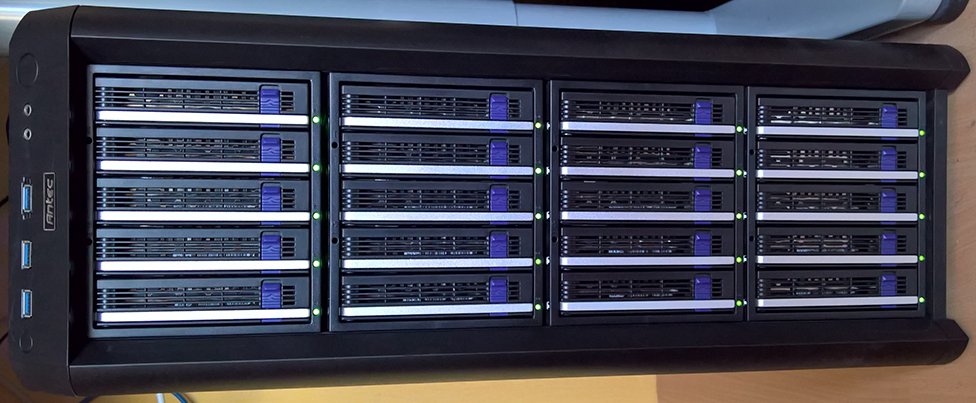
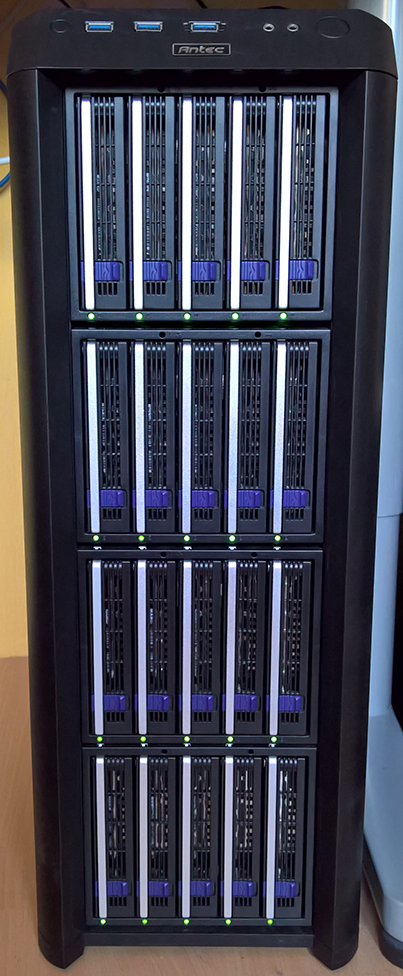
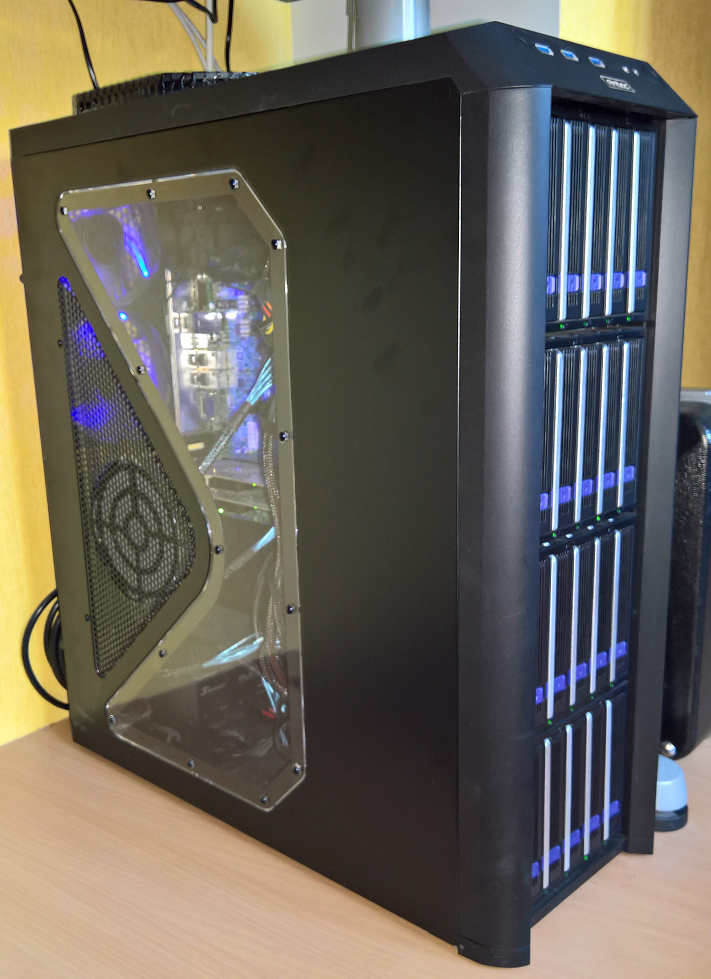
        Case: Antec twelve hundred V3
   HDD cages: 4x Icy Dock FatCage MB155SP-B
Power Supply: Seasonic Platinum 660W
 Motherboard: Supermicro X10SLH-F
         CPU: 4 Core Intel(R) Xeon(R) E3-1241 v3 @ 3.50GHz
      Memory: 4x Kingston 8GB PC3-12800 DDR3-1600MHz
              ECC Unbuff. CL11 1.35V (9965525-139.A00LF)
         HBA: 2x IBM ServeRAID M1015 (IT mode)
 Boot device: Supermicro SuperDOM 32GB (SSD-DM032-PHI)
     Storage: 10 x 3TB WD Red (WD30EFRX)
              10 x 4TB WD Red (WD40EFRX)
    Software: Freenas 9.10
Antec twelve hundred V3
Price: € 186,99
The reason for choosing this case is easy: it is the only tower chassis that has 12 5¼ drive bays that are accessible from the front. Since I want to be able to hot-replace a failed drive without the need to open the chassis, this was the only available choice. Sadly, this case is now very hard to find.
 I ordered mine from Amazo.co.uk which at the time was the only online retailer that had it in stock. Sadly I actually had to return the first chassis I received because the plastic parts were so aged and brittle, the bezels simply disintegrated in my hands… There was some fear that this was going to be the same for any replacement chassis but fortunately, when the replacement arrived, it turned out to be absolutely fine! Now I can only guess that the first one has been stored “badly”, though I cannot imagine what that might mean…
 The case does have excellent cable management and cooling. I have not added any extra case fans (except the fans that came with the HDD cages, of course) and the case stays quite cool. The Antec stock fans are not the most silent I have ever heard, but the fans on the disk cages make slightly more noise. So I would have needed to replace all the fans (4+2+1), or accept the noise pollution. Since this system is in my home office and I usually have some music playing anyway, the noise is unobtrusive enough not to be an issue for me. The blue led’s are quite unnecessary, but also not enough of a reason to replace them. (And to be honest, I quite like them. )
Icy Dock FatCage MB155SP-B
Price: € 97,50
In the old fileserver, replacing a failed hard disk was a nightmare. It was a real struggle to get the 10 drives in that chassis and the cable mess was atrocious. When I decided to build this new fileserver with 20 drives, doubling the cable mess, I decided to spend the extra money for hot plug, front loading HDD cages.
It’s actually a pretty ex pensive option because not only do I not use the drive cages that are supplied with the Antec tower, I spent about 400 EURO on these cages. However now that they are in place, I am very happy with my choice.
Note that none of these cages have active back planes. They all have simple pass through connections. However, the back plane does allow for easy hot-plug insert and removal of drives. The Icy dock Vortex line for example does not have back planes so replacing a drive means you need to go in the chassis and manually connect the cables every time. Something I decided I did not want to have to do.
When choosing these cages, there were a couple of things I worried about…
1. Ease of cabling:
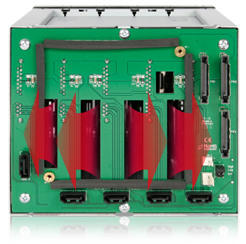
All of these cages have multiple power connectors which surprised me. Some cages required a power cable for every disk because the did simple pass-through. Since it was impossible to find a reasonably priced power supply with 20 sata power connectors, those were definitely out.
The Icy Dock fat cage had a nice layout for the connectors:

The Icy Dock (and all other choices) have three sata power connectors per HDD cage. Again, this surprises me. I could find nowhere if these connectors were meant for redundancy, allowing to connect two power supplies to the cages against power failures. This sounded pretty far-fetched to me but I could not think of another reason why there were multiple connectors… With only one power supply, all those connectors would be fed from the same power rails anyway so…
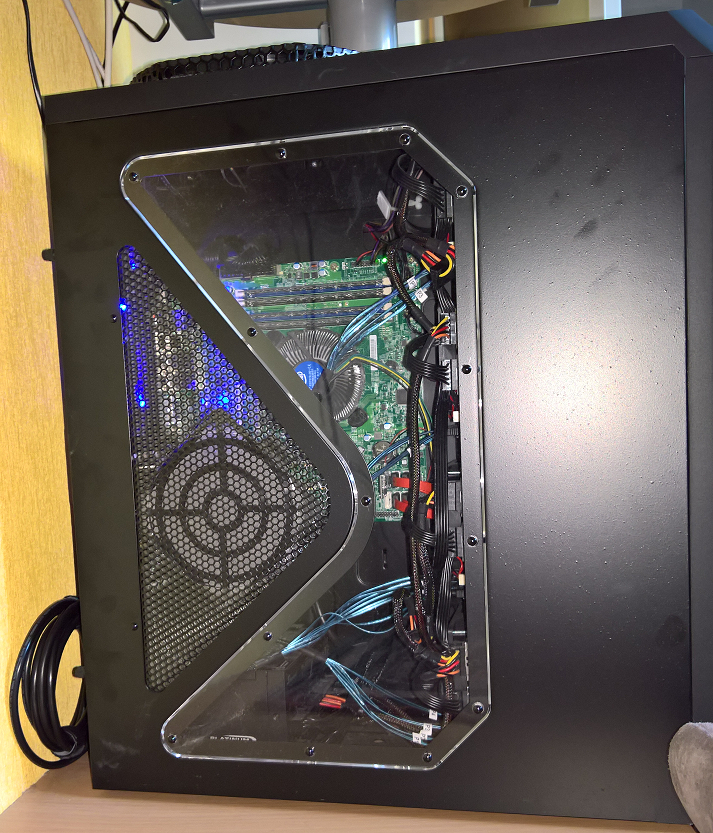
 In the end, I choose to cable up all those power connectors from the same power supply using power feeds with multiple connectors. I still don’t see what the reasoning is, but with 3 sata power connectors for 5 HDD’s in a cage, it did lighten the cable mess and due to the amount of connectors to connect, I got automatic cable management since the power leads are quit tight. The first two cages have been running sine August wuthout issue in this configuration and
The sata data cables were a easier choice: at the price point I was looking, none of the solutions had sata expander’s so they all needed 5 sata cables.
Update (13-Nov-2016): I received feedback on this section from Stux on the Freenas forums. The multiple power connectors are needed due to the limitation on the amount of current that is allowed to flow over a single sata power connector. Powering more than two drives over a single lead would exceed the safe power limit and possibly melt the connector. Do go and read Stux’s post for the full story!
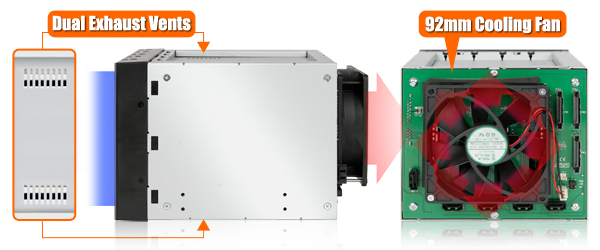
2. The fans: control, noise and cooling
The second worry point was about cooling. Disk cages with 5 3,5″ drives are much harder to cool that the three disk variants. There is simply less space between the drives so a decent fan is required to push air over the drives. These Fat Cages were the only cages with 92mm fans. They also have three fan speed settings. I did find a cage that had temperature monitoring with automatic fan speed settings, but it sounded like overkill and they were outside the budget.
 I now have these fans set to the medium setting because on full, the fans are really too noisy. If medium does not suffice, I could always replace the fans with less noisy ones, since the fans are replaceble on these cages (another point in their favor) but silent fans usually also cool less, so I am not entirely certain if that would actually accomplish anything…
Anyway, on medium, the cages have been running for 3 months now without any issue. Holding my hand in front of the cage, I can clearly feel air being pushed over all the drives. So the cooling design does seem to do an adequate job.
3. The warning LEDs
The cages have individual LEDs for each disk that can be green, amber or red depending on the drive status. Now I really wanted to LEDs to work because with 20 drives, if a disk fails, it would help a lot to be able to simply see the red LED and know what disk needs replacing.
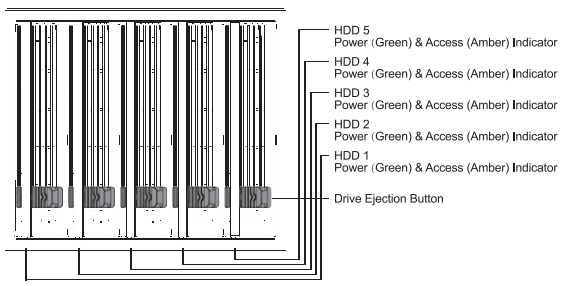
Note that the manual only mentions the green and amber states. I can confirm that the red state also exists: when placing the disks, a shiny red LED let me know I had a bad alignment on one drive!
But the information I could find said that the function of the LEDs depends on the sata data connection used. Some of the motherboards and HBAs present status info, some do not. It was impossible to find if my motherboards and HBA’s had this function. So I took it on faith that the LEDs would work and I was very relieved to see that indeed, they do work!
At least they work with my motherboard/HBA/Disk combination. Your mileage might vary…
4. How solid are the disk trays
The next worry was how the disks were inserted. Some cheaper cages come without trays: you simply allign the disk manually and firmly press then in place. In my profesional career, I have had plenty of mis aligned disks that caused erratic connection issues so this was an aspect I did not want to skimp on. I wanted solid, locking drive sleds for my precious data!
The sleds on these cages are reasonably solid and fit very snugly. When locking the trays in place, they are firmly locked in. I do not thing there is much risk of accidentally ejecting a drive.
FYI: on the icy dock web page for these fat cages, the image for the tray is actually wrong: it shows a simple (flimsy) frame consisting of two pieces of metal that attach to the sides of the disks. The cages I received are actually U frames, they are real trays with a metal bottom that the drive lies on. If you use 2,25″ drives, you actually attach them to that bottom.
So with the happy surprise of the better than advertised disk trays, I am quite satisfied.
5. Will the HDD cages fit in the chassis
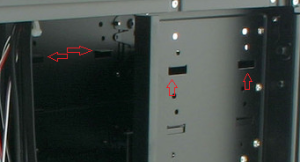 Ah yes… this is an issue. Any HDD cage that fits 5 disks will have a problem with the metal latches in the computer chassis you normally rest the hard disks on. Here is a detail picture of the antec chassis wit red arrows to those little metal latches.
These things are present in pretty much every chassis and are very usefull under normal circumstances. Any HDD cage with 3 drives allows for the drives to be placed horizontally and this way, these cages allow space for the latches. A 5 disk cage however must put the drives in a vertical position and there is simply no space to allow for those latches.
 A bit of DIY was required to solve this. I went out and purchasd 3 different size F-clamps and used those to flatten the latches. I needed three sizes of clamps in order to reach all the latches. A large C-Clamp would also work, but I could, not find a deep enough C-clamp. It was a bit of work, but in the end, the latches were flattened and the disk cages were installed without much issue.
Seasonic Platinum 660W
Price: € 154,90
For the power supply there were two criteria: size and connectors.
How much power will be required by the system
For the first, it is a rather easy exercise to look up and add all the power requirements for all components. It’s a bit of work, but it’s doable. For the hard disks, the “start up” power consumption must be used. Mosts HDD do not require much power during normal operation, but when the disk spins up at boot time, they will require a lot more. Considering this system will have 20 disks, this becomes an important power requirement.
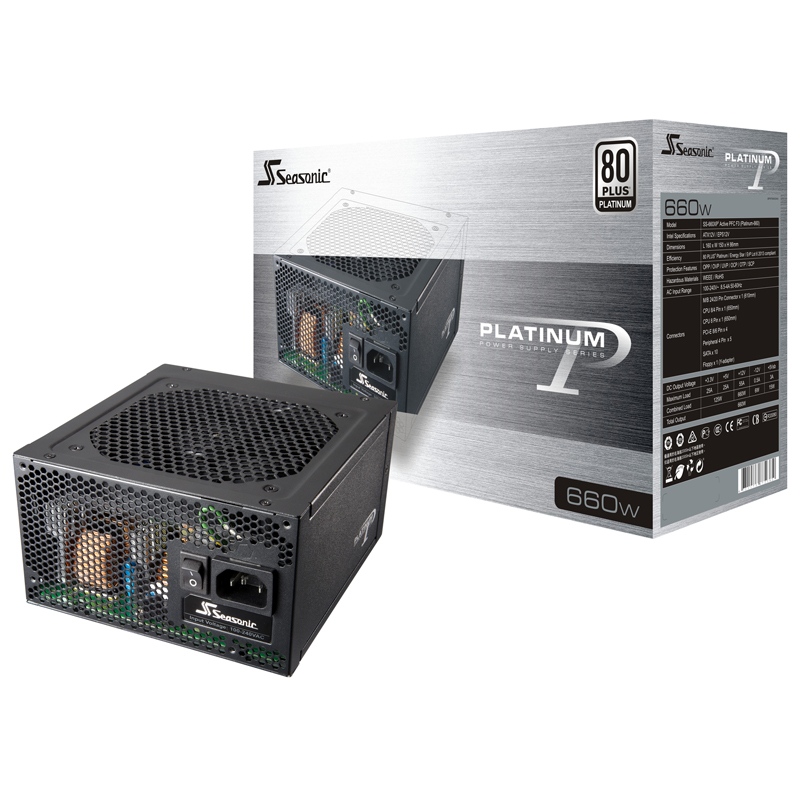 Adding up all the components, I arrived at just under 400 Watt. Since most power supplies function optimally at about 80% usage, I went for a 660 Watt power supply. I chose Seasonic simply because they are usually good quality, are decently prices and I have good experiences with them.
I’t actually funny: I have not purchased this small a power supply in a while… This is the smallest version they have… 🙂
I only strayed away from Seasonic once in the past, getting a Be Quiet! Dark Power Pro power supply for my desktop rig and that turned out to be a bad move: it had a tendency to just stop working at which point I needed to disconnect all internal cables, cycle the power supply and reconnect everything. I do not overclock, and the 1000W power supply is more than big enough… That Be Quiet! is now lying “quietly” in a corner and my desktop computer has been happy with a nice Seasonic platinum 1000W power supply for a couple of years now…
How many sata power connectors will be required
 The Seasonic power supplies also come with a nice array of power leads. However, the 660W version I got did not have enough sata power connectors on the leads. I looks like Seasonic does not believe people will put more than 14 drives in a computer? Go figure! 🙂
But the cable leads from my 1000W desktop power supply are compatible with this 660W version so I was able to swap some leads around, getting the required 4×3 sata power connections.
These leads are sold separately by Seasonic so if you don’t have any spares lying around, you should be able to get them. The only alternative is to get a larger power supply, since these have more leads, but that is more expensive and you do not need the power. Now that the system is fully built, I have done some power measurements and during boot, the system takes a maximum of 295 Watt. During normal operation (just doing Cifs/NFS/DNS/DHCP/virtualbox/transmission/plex/etc… duty) the system “idles” just under 135 Watt. If I simultaneously listen to music, play a movie and do some file copying, consumption stays below 200 Watt.
Turns out I actually have much more head room than I had expected so I am quite content with my 660 Watt power supply!
That’s it for this first part. In the next installment, I’ll cover the internals of the system and provide ful price details at the time of putting this together.
I am happy to answer any questions on this build. 🙂